photo logocopyFINAL2_zps4f3aeeb2.png
Showing posts with label recycled art. Show all posts

5 Minute DIY: Making Flowers Out of Paper Towel Rolls

Just a quick post on how to make these flowers. They're all over the wall in our apartment and a friend of mine asked me to do a quick tutorial over how to make them. It'll take you five minutes.
You'll need: paper towel rolls, scissors, a stapler & some push pins.
Cut the roll into sections. I made mine kind of skinny, but you can make yours bigger if you like. 
When you've finished cutting the roll it will look something like this.
Lay out the rolls so you can kind of see the flower pattern.
I think it looks best when you use five or six pieces.
Grab your two pieces and hold them.
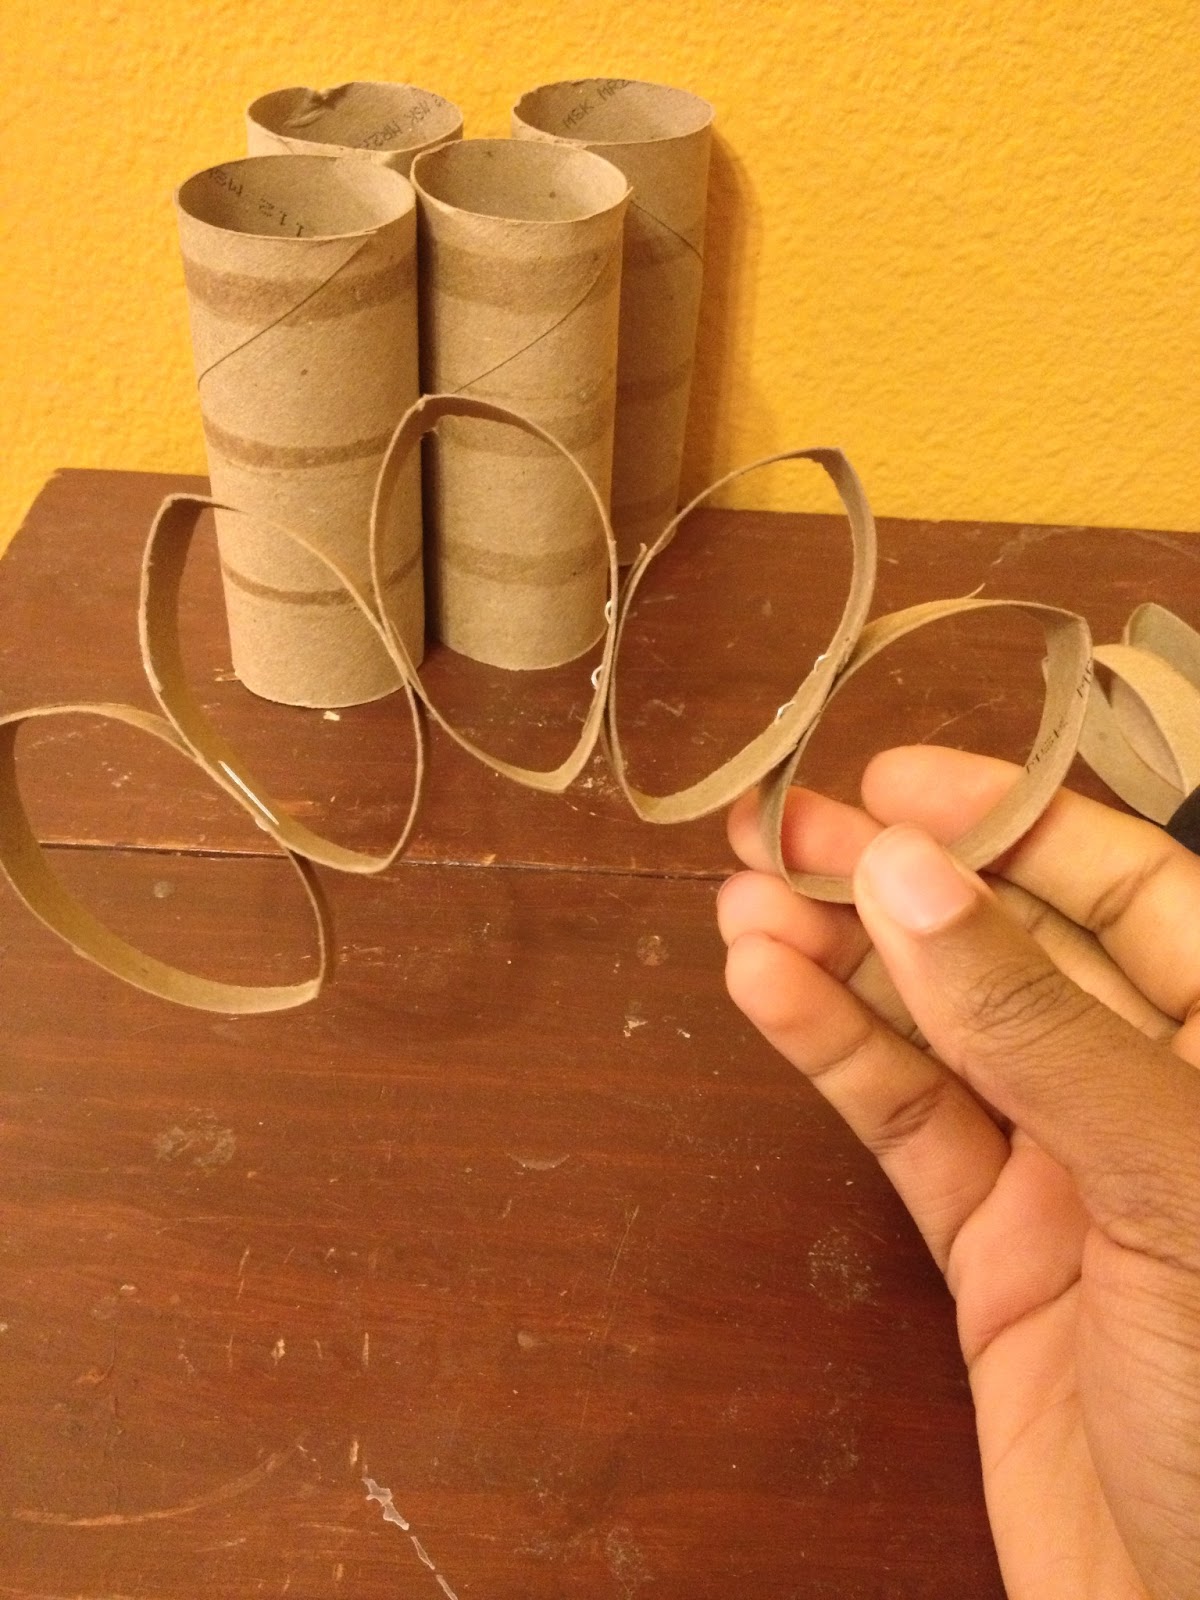
Staple the two pieces together. 
Try and get the staple close to the end of the roll.
Repeat the process until it looks something like this.
Then staple the last two pieces together.
Your flower is now ready to hang!divider

More Recycled Art: Can Love

Can Love is run by DJ NEFF and Paul Ramirez out of Venice, California. They create custom art out of spray cans. Their innovative process blurs the line between organic and mechanic. See their work below. 
images via Can Love
Everything they make is one-of-a-kind and custom bouquets are available for purchase. If you have any special requests feel free to contact them here!
divider
Location: Houston, TX

Trash to Treasure DIY: From Exit Sign To Art


Hey everybody! Hope you all are enjoying the weekend. I came up with a pretty cool idea for an artistic DIY. This is my first step-by-step how to, so hopefully it's not too confusing.

I got inspired to do this piece when found this exit sign by the dumpster the other day. So many people are throwing out things because of it being the end of the semester, but when I saw it I just couldn't stand to let it rot in a landfill somewhere. So I thought that I'd re-purpose it and make it into art.


Here's what you'll need:

- Scissors
- Tape
- Exit sign
- Tape measure
- Colorful paper. (I got mine from Hobby Lobby)
- If the sign is really hard to take apart you might want a screwdriver.


Look at the top and the bottom of the Exit sign, there will be little grooves that clamp together.
You will need to take these apart in order to create your piece.


I just used my fingers to pry apart the two sides, but because this exit sign was pretty old it was kind of hard to do. I ended up breaking one of the clamps. So, if you are having trouble with taking yours apart I would suggest using a screwdriver to better wedge apart the two sides.


Once you pry the two sides apart it should look something like this. I took out the red exit sign transparency that was attached to the front side of the sign. It was glued on fairly well, so I had a bit of trouble trying to get it off. But if you use a little bit of elbow grease you won't have a problem haha.


Once you have the front half of the exit sign detached, measure the width of the letters.
I found that mine were 1 inch to 2 1/2 inches across.


Now back to the project: You can move the back side of the exit sign out of your way.
You won't be needing it until the second to last step. 


Once you have the sizes of all the letters cut your paper accordingly.


Line up all the cut pieces of paper below the letters and make sure that they fit the length and width of the letters. (If you are using 8.5x5.5 paper then you won't need to worry about the height)


Tape down the paper at the bottom of all of the letters.
Make sure that each piece of paper covers up the entire letter.


As you start to tape down the rest of the paper check to make sure that nothing is overlapping. If that happens just trim down the sides. That way two colors won't show on the front side of the sign.


Repeat the taping and trimming process until done.


When you're finished the inside of your exit sign will look something like this.


Flip the taped side over to the front. If there are any empty spaces showing in the front be sure to
re-adjust the paper until all of the empty space is covered. 


Once all of the letters are covered reattach the front of the sign to the back.


Make sure that the front is firmly secured to the back.
Once that's done your piece is ready for you to hang up!

Feel free to comment or ask questions below if you have any trouble!