The lecture tonight was really amazing. I got to meet a bunch of new people from all over the country and even Latin America. I'll go more in depth with all that happened tomorrow. I'm wicked tired.
Meet the Landscape Artist: Richard Shilling
images via Richard Shilling
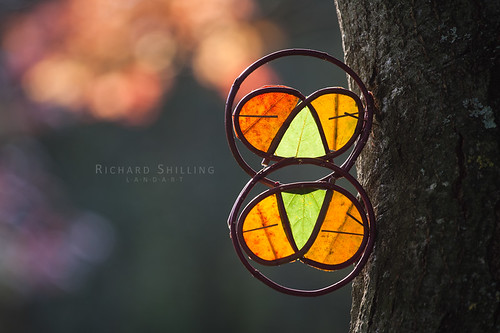
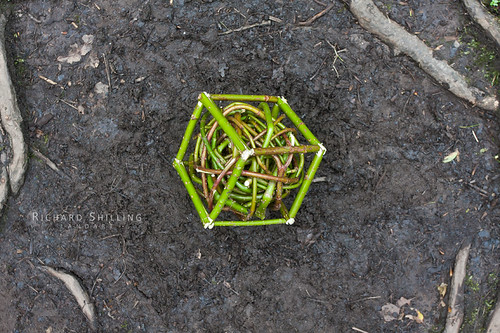
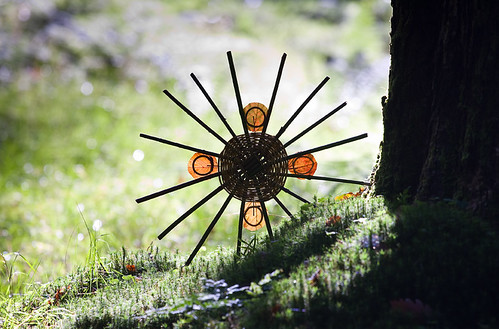
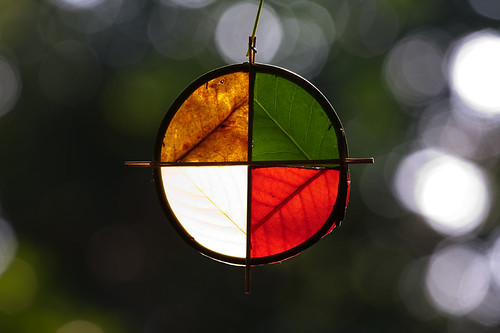
Richard Shilling is an accidental artist who stumbled across an Andy Goldsworthy sculpture in the middle of nowhere a few years ago. He was so intrigued that he asked around, did some research and discovered that the work was indeed Andy Goldsworthy's. He was so inspired by his land art that after learning all that he could about his work he went out and started to make his own. The further he delved into the world of Goldsworthy he became extremely passionate about land art. It inspired him and led him to connect deeply with nature and the world around him.
Shilling explains land art as a simple process that involves wandering around somewhere in nature without any preconceived ideas. Once he see's a shapely rock, or a breathtaking leaf this will inspire him to create something with these items.
He has some advice for those that want to create land art:
1. Go somewhere and open your eyes.
2. Look at what is out there. See the colors, shapes and forms.
3. Select the materials that appeal to you because of their shape or color.
4. Collect as many of these items as you can.
5. Make a pattern, swirl, circle, or anything that you like with what you have found.
This will lead to a better connection and appreciation of nature, while sparking your inner creativity too! So get out there and try to make some land art of your own! I know I will as soon as I find some time, and I'll make sure to post whatever I create.
More Recycled Art: Can Love
Can Love is run by DJ NEFF and Paul Ramirez out of Venice, California. They create custom art out of spray cans. Their innovative process blurs the line between organic and mechanic. See their work below.
images via Can Love |
Meet Luk Czajkowski of Burnt Toast
I was immediately intrigued by Burnt Toast's blog when I stumbled across it a couple of weeks ago. When I contacted him for an interview I was pleasantly surprised when he said yes! I learned he's been in love with fashion for quite a long time. His passion is what has made him so successful as a model, photographer and fashion blogger. Check out the interview below, Burnt Toast is definitely someone to keep your eyes on.
images via Burnt Tost/Facebook
Łukasz Czajkowski, 19
Photography Student, Model, Fashion Blogger Torun, Poland How did you come up with the name Burnt Toast? Does it mean anything?
I hate this question, because I don`t have a special answer. I just wanted to make different and characteristic name and that`s why I`m Burnt Toast.
How long have you been interested in fashion? What sparked this interest for you?
All my life. When I was a child, my mother always asked me: "What should I wear?" and I helped her. What sparked this interest for me? My mother, I think. She wanted to be a designer and in my opinion she has a great taste of style. I was looking at her and I was learning. She is one of the best part of my life.
What made you start a Facebook page? What made you move to a blog?
When I started my Facebook page I was doing great as a photographer and also I was a model. I didn't have my own fashion blog. It was one year ago. I opened my fashion blog in August this year. I thought that it can be something great to me and I will show myself to the world in different ways. I did it and I'm very happy.
What are you currently doing now? (are you a student, stylist etc?) and what are your plans/goals for the future?
I`m student of photography. I'm not working, yet. I want to have my own fashion magazine. I hope I will take photos in future. But we will see, maybe I will be a soldier... just kidding.
Who takes your pictures for you, or do you take them yourself? What kind of camera do you/they use?
Sometimes my cousin (11-years old) and sometimes photographers. It depends where am I and what I`m doing. I have a Nikon d3000. Nothing special but I'm quite satisfied.
What was it like working with Catarina Magazine? What kind of collaboration did you do?
I made a video where I answered a few questions. It was on summer and I was on holiday. I made this video on the beach. It was great collaboration, we haven`t got any problems.
From the time you wake up, how would you describe your typical day?
I spend a lot time in my bed. I sleep 12 hours. When I wake up I take a shower. After this I drink coffee and I check news. You know - face book, e-mails and things.
I relax with music. Sometimes I spend all days in home but other days I take photos or I meet my friends. I also take photos on my fashion blog. In the evening I watch TV series like 'Gossip Girl', 'Homeland', 'Amercian Horror Story'. In the night, I write poems, I really do. Every day is a different day. I travel a lot. In one week I`m in three or four cities.
What would you say is the best advice you've ever been given?
Be yourself no matter what.
If you could go anywhere in the world (to visit or to live) where would it be and why?
I want to visit Paris. I was there but I was a child. I dream about a week in Paris with someone I love.
I also dream about living in New York. I think there`s different world ore maybe I just watched to much "Sex and the city".
Lastly, what can’t you live without?
Gossip Girl, cola zero, sex, music and my love.
|
Meet the Artist: Cal Lane
Cal Lane is a rather remarkable artist and she's not afraid to get her hands dirty. The self-described tomboy was once a hairdresser who traded in her profession for welding over twelve years ago. Apparently there are some surprising similarities between cutting hair and cutting steel, and she started cutting delicate lacy patterns into rusty objects and industrial metal.
images via Cal Lane
Her work has been shown internationally and was even featured in the Museum of Arts and Design in New York. The contrast between industrial metal and the delicate patterns the 39-year-old artist carves into these items is so intriguing. You would think that the contrast would not work between the two elements, but it's surprisingly harmonious. I can't wait to see what she comes up with next!
Women Are Hero's
images via jr-art.net |
JR is a mysterious artist that creates "Pervasive Art" all over the world. In 2008, he did an exhibit in the favelas of Brazil to pay tribute to the women of the area. Moro de Providencia is an area that sees a lot of violence, and unfortunately women are often victims of this conflict. I first learned about the social issues of this area last year in a Geography class. Dr. Strait did some work in Brazil at the time and he let us know that when JR creates his work he doesn't just go into a country, install his piece and leave. He gets involved and engages the community. For this particular installation, Women Are Hero's, the women of the area got a chance to be models for a day and kids were given the opportunity to help create this piece.
JR is definately in the top five of my favorite artist's. I love how his work challenges the world's traditional thoughts of freedom and forces them to address various social issues in the world. He leaves just enough space between his subject and the interpreter that they are able to formulate their own thoughts about the subject at hand and decide if they are going to act upon these thoughts or not. Because that is what JR's work is supposed to do, raise questions...
Location:
Houston, TX
Trash to Treasure DIY: From Exit Sign To Art
Hey everybody! Hope you all are enjoying the weekend. I came up with a pretty cool idea for an artistic DIY. This is my first step-by-step how to, so hopefully it's not too confusing.
I got inspired to do this piece when found this exit sign by the dumpster the other day. So many people are throwing out things because of it being the end of the semester, but when I saw it I just couldn't stand to let it rot in a landfill somewhere. So I thought that I'd re-purpose it and make it into art.
Here's what you'll need:
- Scissors
- Tape
- Exit sign
- Tape measure
- Colorful paper. (I got mine from Hobby Lobby)
- If the sign is really hard to take apart you might want a screwdriver.
Look at the top and the bottom of the Exit sign, there will be little grooves that clamp together.
You will need to take these apart in order to create your piece.
I just used my fingers to pry apart the two sides, but because this exit sign was pretty old it was kind of hard to do. I ended up breaking one of the clamps. So, if you are having trouble with taking yours apart I would suggest using a screwdriver to better wedge apart the two sides.
Once you pry the two sides apart it should look something like this. I took out the red exit sign transparency that was attached to the front side of the sign. It was glued on fairly well, so I had a bit of trouble trying to get it off. But if you use a little bit of elbow grease you won't have a problem haha.
Once you have the front half of the exit sign detached, measure the width of the letters.
I found that mine were 1 inch to 2 1/2 inches across.
Now back to the project: You can move the back side of the exit sign out of your way.You won't be needing it until the second to last step.
Once you have the sizes of all the letters cut your paper accordingly.
Line up all the cut pieces of paper below the letters and make sure that they fit the length and width of the letters. (If you are using 8.5x5.5 paper then you won't need to worry about the height)
Tape down the paper at the bottom of all of the letters.
Make sure that each piece of paper covers up the entire letter.
As you start to tape down the rest of the paper check to make sure that nothing is overlapping. If that happens just trim down the sides. That way two colors won't show on the front side of the sign.
Repeat the taping and trimming process until done.
When you're finished the inside of your exit sign will look something like this.
Flip the taped side over to the front. If there are any empty spaces showing in the front be sure to re-adjust the paper until all of the empty space is covered.
Once all of the letters are covered reattach the front of the sign to the back.
Make sure that the front is firmly secured to the back.
Once that's done your piece is ready for you to hang up!
Feel free to comment or ask questions below if you have any trouble!